|
||||
News Sep.8.2000 - CornFlake News:
August.24.2000 - CornFlake News:
August.11.2000 - Community News:
July.18.2000 - Modelling News:
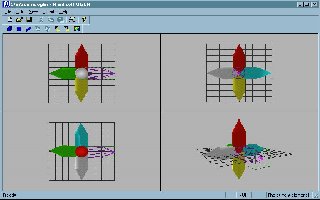
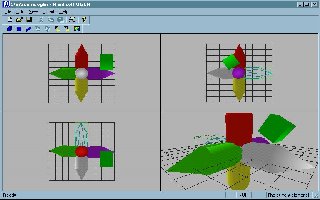
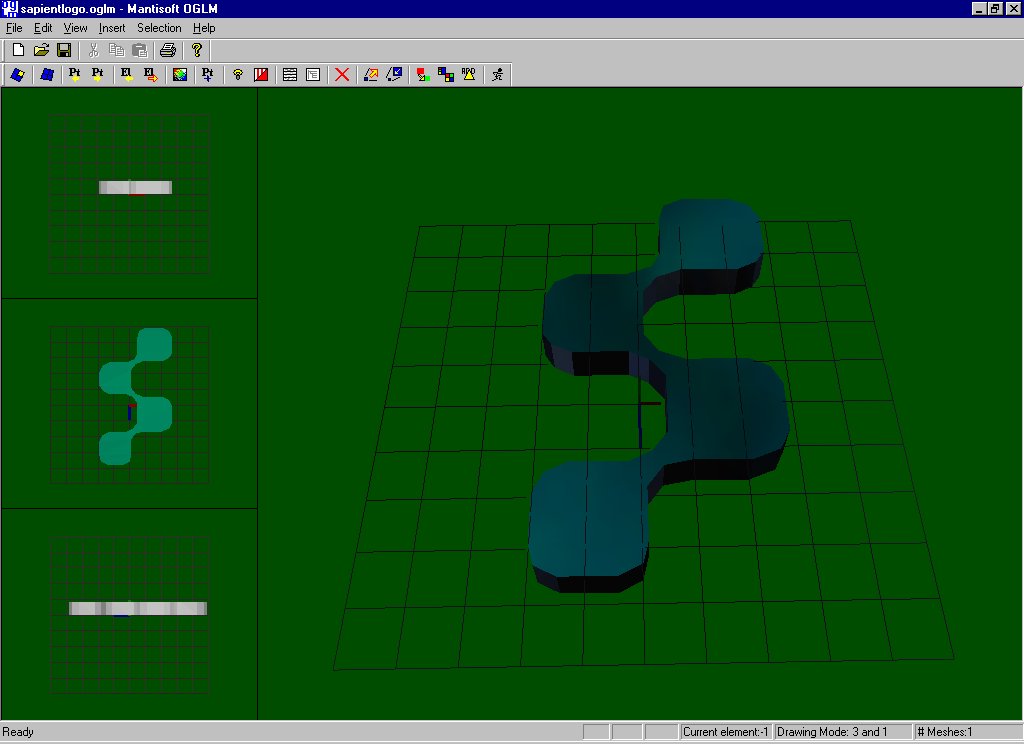
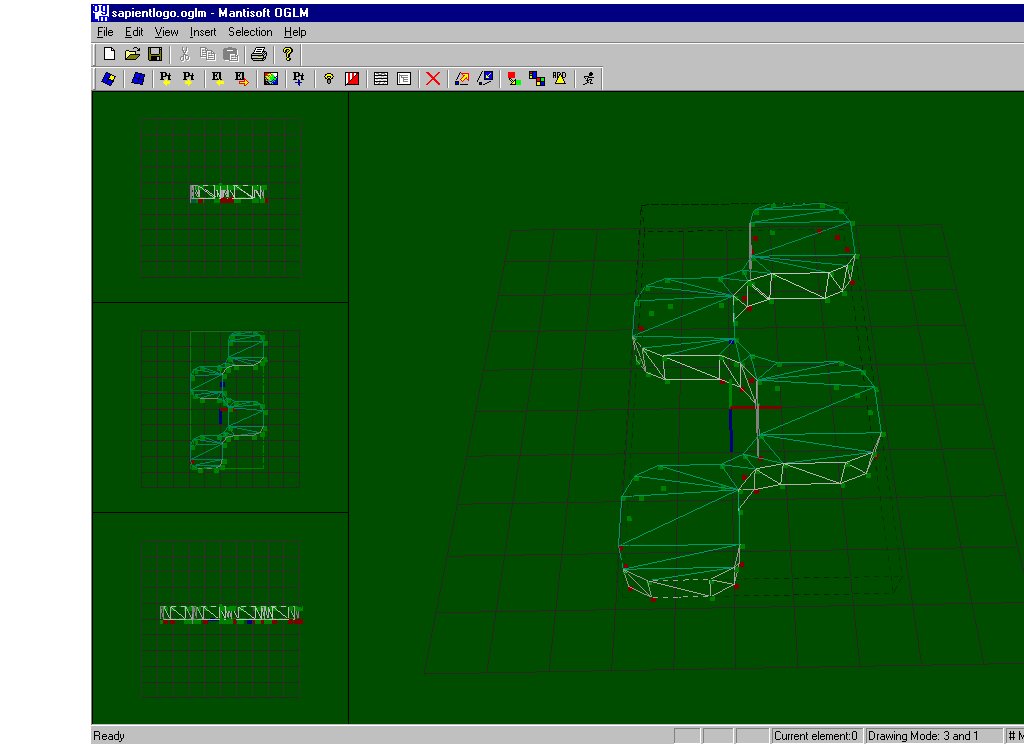
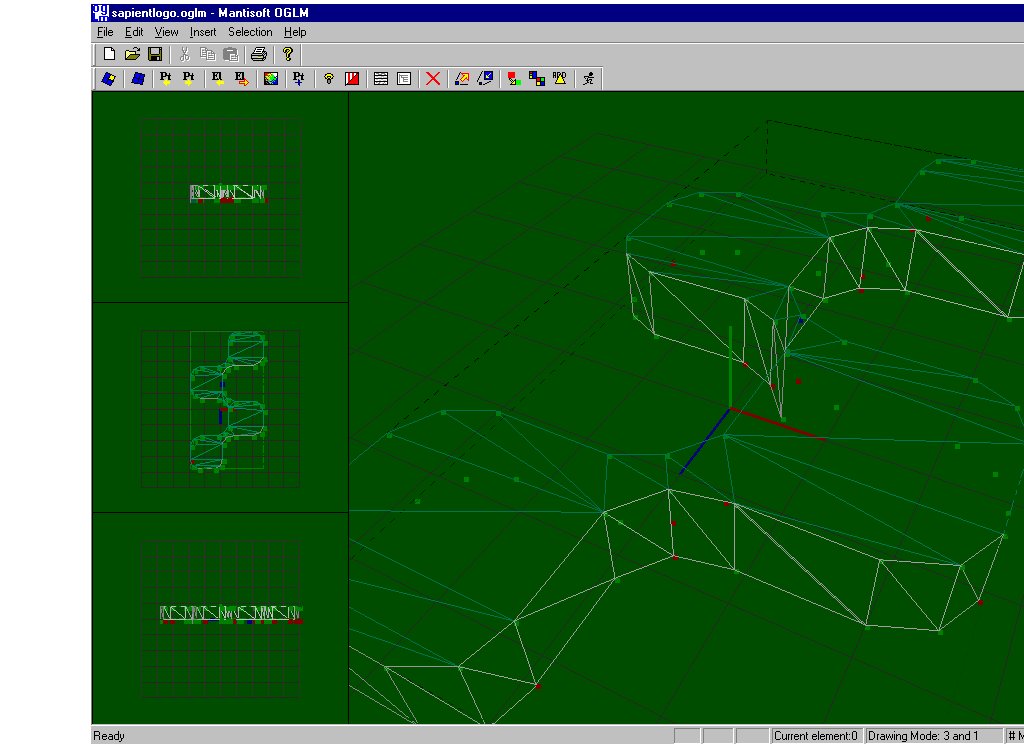
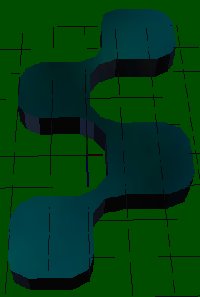 I'm afraid I haven't had time to complete any decent models, the ones I've been using thus far I've thrown together, literally! I wanted to post some screen shots though of a semi-decent model so here they are: Shot 1,
Shot 2,
Shot 3. These are shots of Sapient Corporation's logo. I wanted to create something semi-complex and this was what I picked. It was pretty simple but it did highlight a number of issues with the modeller which I need to fix in order to make it really useable. I also threw in environment mapping for the texture shot, pretty nice eh? Stay tuned.
I'm afraid I haven't had time to complete any decent models, the ones I've been using thus far I've thrown together, literally! I wanted to post some screen shots though of a semi-decent model so here they are: Shot 1,
Shot 2,
Shot 3. These are shots of Sapient Corporation's logo. I wanted to create something semi-complex and this was what I picked. It was pretty simple but it did highlight a number of issues with the modeller which I need to fix in order to make it really useable. I also threw in environment mapping for the texture shot, pretty nice eh? Stay tuned.July.13.2000 - Community news: http://shockonline.homestead.com/OpenGLGameProgramming.html
is Frag-Daddys's page and I just heard he's posted an excellent tutorial on collision
detection. Head on over there. July.06.2000 - Quick mini-update. I had a good weekend but am
having a terrible week. Looks like I won't have time to update until next week. Work is
just too busy right now. I'll be working this entire weekend and probably into next week
too. In anycase I have made major changes to the OGLM. It now allows elements to share
vertices and hence make a single continuous mesh. It also has the guts of the animation
coded. I just need to slap an interface on the thing and I'm done. Thanks to Derrick
Dixon, Robert Zukowski and Frag Daddy among others for all the feedback/interest. Keep it
up. I'm working on a beautiful model for you all to checkout soon and with a bit of luck
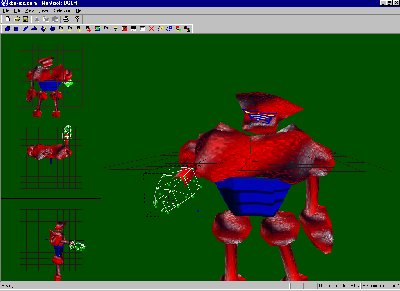
it'll be animated too. Later... June.28.2000 - Here's the deal, I've been getting up at 5:30am and working until 8:00pm. It doesn't leave a lot of time for modelling work. Plus I'd like to expand the site with peoples' contributions but it looks like you guys aren't interested as I haven't had any responses. The traffic is holding pretty steady at about 70 people per day, I'm struggling with motivation at this point as I'm not getting enough rest as it is. Oh well, enough complaining, I'll try and get the next tutorial added shortly. I'm also struggling with the format of this page so I've made it a little wider to make it easier to read. I've also added the screenshot on the right of "X-Box Joe". He's my first attempt at a xbox-robot look-a-like. Ok the textures aren't the best but the model-mesh is sound. Hope you like it. That's about it for now.
Ok update, the racing game turned into space mountain which is up on the site.Enjoy.
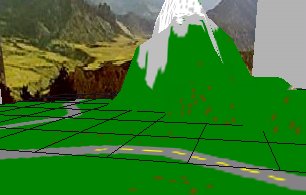
April.1.2000 - Lots happening these days. I've just completed my first BASIC model. It's a landscape with a few textures. It's still very basic but only due to the limited number of hours in a day. I've uploaded a screenshot to give folks an idea of what it's like. Next up I plan to use this to enchance my car racer. I'm going to add on more to the article VERY soon so keep checking back. Also looks like opengl.org is going to give the site a mention. Fingers crossed ;-) Check it out at the OGLM piece. Mar.27.2000 - Happy day! NeHe has just added a link to this
page on his site. If you haven't you should definitely check his page out. It's been a
great help to me as it has a ton of tutorials and is all about helping the programming
community. Check it out at NeHe Productions. Thanks
NeHe ! Mar.25.2000 - Today I decided due to the number of hits, to give out the code to my Car Racer. It's EXTREMELY basic as such, it'll give you all a good idea how to write a basic game. Basically, this is the project I was working on when I decided to write the OGLM. Mar.24.2000 - News Flash - Today's my birthday so I've decided to give away something ( instant Karma ). I've just posted the source code to an openGL screensaver. It's well commented and should give you all a tremendous head start when writing a screen saver. All initialization is done for you. All you have to do is add in the drawing code. Enjoy. Mar.20.2000 - I just added "The Making of OGLM" Just for all you out there who are struggling with writing a 3d modeller. It's the hope that this will give you all some pointers. Let me know if it helps or if I'm skimming over stuff too much. I'll be happy to post code snippets here to help you all out. Feb.16.2000- Alright, time to make this useful. Last few weeks I've been kinda busy. I've been working on a bunch of stuff with OpenGL. Predominantly the OGLM, Open GL Modeller. I started writing a nice 2-D racing game and then quickly found I need a way of editing and creating models. Hence the modeller. I'm also documenting the development of it which I'll clean up and post here eventually. Oct.31.1999 - Add links to all the software so far. Oct.30.1999 - Finally got the site to look semi-ok. Things are starting to materialize and hopefully I can stick with this layout for a while. I changed the Cornflake logo from just grey to the more interesting Gold/Yellow color. Created the background blue and black started on a navigation bar. Oct.29.1999 - Created 'Fran-Browser', a web browser in C++ using some Active X controls I found lying around my machine. Works pretty easy and wasn't too hard. Must look into adding ftp support. Oct.28.1999 - Created my first Palm Pilot PRC file from scratch using the gnu C Compiler. Mental note = Must add a link to the pilot SDK and the GCC web-site. Very cool. OpenGL - Jun.22.2000 This is my editor. I'm about 60% done. It's basically being written so that I can create some models and terrains for some games I'm working on and coordinate animations of these models. Check out the updates above and to the tutorial below. You can create, move, edit, rotate, add cylinders, cubes and strips. I'm in the process of adding point manipulation, texture mapping and a bunch of other stuff. The models save to binary which is nice. There are also a number of cool tools I've added such as Lathe, Extrude and preview. Partial save, is semi-working right now. I'll keep you all posted.
The Making of OGLMIntroductionThis document is intended to describe the steps taken when building a 3Dimensional Modelling tool. I’m going to attempt to write this document in an easy to understand format. Thus you shouldn’t need very much programming background to understand it. If you have any questions regarding specific pieces of the development, email me directly and I’ll adjust/add the content to this document to help you out. Having said that, the first draft will assume some familiarity with both OpenGL and C++ but only the basics. You’ll be surprised just how easy it was to build. I’m also not releasing the source code yet until I’m very confident in the demand for it. Read on… And now a disclaimer: The views expressed here are my own, I’m not in any way an expert and hence the way I do things is not necessarily the best way to do them. When you don’t know how to do anything, this document might help you. If you are smarter than I, you probably not learn a lot. Etc…. What’s OGLM and Why did I build it ?
|
 | Programming for fun

 Ok gang, sorry for the lack of updates. I've had connectivity problems and work's been crazy yada, yada yada. News is the selection tutorial has gone down a treat. If you haven't read it yet scroll on down and dig in. The next addition's going to be a doozy. It's all about building a nice Lathe. Should be ready in another few days.
 Wow, it's sure been a while since I've
posted any updates to this site. I wanted to let you guys know that the site's not dead.
I've been working steadily away on things, it's tough but no one said it would be easy. If
it were easy to create a modelling tool and hold down a job, EVERYONE would be doing it.
I've had some home improvements, visitors to entertain and a ton of work to get through so
things have been slow getting to the site. Despite all this I've made significant
head-way. In fact with the exception of tidying up the interface I would estimate that I'm
almost done coding. The OGLM now has a preview window where you can load objects before
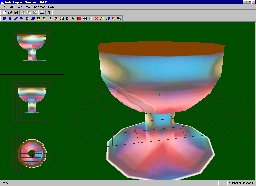
you add them to the scene. You can add children of objects and build a true hierarchy. You
can also create objects like the Goblet in the picture within about 2 minutes of work,
literally ! This is through use of the Lathe tool I've added to OGLM. I've updated the
executable download, it now has a bunch of textures and a small readme.txt, I'll be
working on this more in the future. In addition I'll update the tutorial to tell you how
to build these cool tools like the lathe. For now you'll have to make do with the
walkthrough of how to code the Loading and Saving routines for your modellers. Stay
tuned...
Wow, it's sure been a while since I've
posted any updates to this site. I wanted to let you guys know that the site's not dead.
I've been working steadily away on things, it's tough but no one said it would be easy. If
it were easy to create a modelling tool and hold down a job, EVERYONE would be doing it.
I've had some home improvements, visitors to entertain and a ton of work to get through so
things have been slow getting to the site. Despite all this I've made significant
head-way. In fact with the exception of tidying up the interface I would estimate that I'm
almost done coding. The OGLM now has a preview window where you can load objects before
you add them to the scene. You can add children of objects and build a true hierarchy. You
can also create objects like the Goblet in the picture within about 2 minutes of work,
literally ! This is through use of the Lathe tool I've added to OGLM. I've updated the
executable download, it now has a bunch of textures and a small readme.txt, I'll be
working on this more in the future. In addition I'll update the tutorial to tell you how
to build these cool tools like the lathe. For now you'll have to make do with the
walkthrough of how to code the Loading and Saving routines for your modellers. Stay
tuned...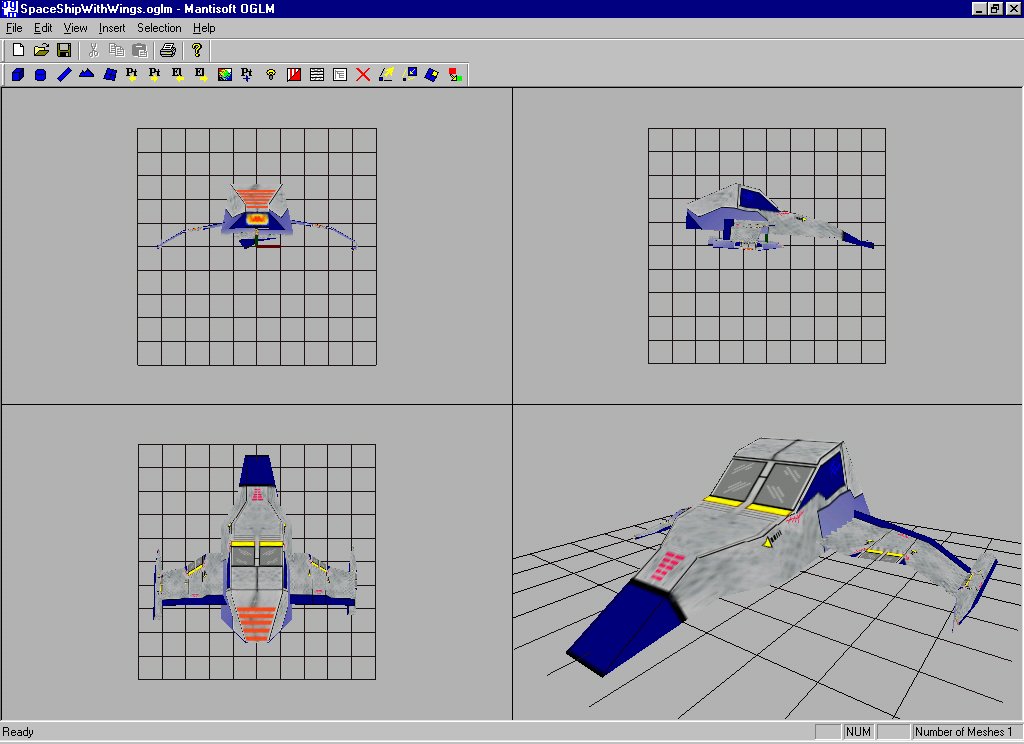

 I've tried this on a few laptops with no cards and
the framerate is pretty good. I've developed it on a 3dfx Voodoo 3000 PIII450mhz and
experienced problems with the selection algorithm I've used. As a result I've switched to
an nVidia card on my laptop and that seems to work perfect. I'm now boycotting all 3dfx
products. They suck !. Let me know if there's any problems with other cards. Anyway,
that's all for now.
I've tried this on a few laptops with no cards and
the framerate is pretty good. I've developed it on a 3dfx Voodoo 3000 PIII450mhz and
experienced problems with the selection algorithm I've used. As a result I've switched to
an nVidia card on my laptop and that seems to work perfect. I'm now boycotting all 3dfx
products. They suck !. Let me know if there's any problems with other cards. Anyway,
that's all for now.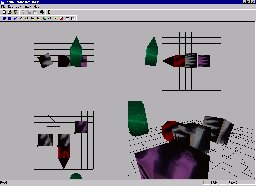
Elevation |
Side Elevation |
Plan |
3Dview |
Ok this is a basic representation but as I’ve already said, I’m pretty lazy.
We’d also like to be able to click in each of the quadrants and move things around, add items, stretch objects, move vertices, rotate things, zoom in and out, etc.
The question arises, how are we going to layout our code so that it doesn’t become a big mess and a nightmare to maintain. This is the point in the show where I like to turn off the computer, go make a cup of tea, eat a cream bun and read a book. After letting the thought simmer in my head for a few hours, it all becomes clear. I’d encourage you to do the same.
Since there’s going to be four independent views and each view is basically the same thing just seen from a different angle, we need to create a single class which encapsulates this functionality. Then we’ll simply create four instance of the same class, set a few parameters in each to make them work slightly differently and draw each one in turn. Let’s call this class our GLScene().
Act 1 Scene 1 paragraph 3…
Let’s start building our GLScene Class. Right click on the project window and select Create New Class. If memory serves you should change the class to Generic Class and type in the name GLScene. Here’ where visual C is so handy. It creates CPP and Header files for you and adds them to the project. Now we’re ready to create some member functions. At this point I figure I’d like to enforce a standard. All OpenGL related functions I’m going to prefix with a "GL". Don’t ask why.
Right click on the newly created class and select add member functions. We should create a couple of functions right away:
GLInit() – Initializes some member variables. Not sure what these are at this point but I know we’re going to need them. We’re also going to need to intialize some OpenGL type factors and this is where I’m forecasting I’ll do that.
GLDraw – Every scene should know how to draw itself so I know I’m going to need this. For now I’ll just make a call to draw a torus here. We’re going to use the auxilary library for that.auxTorus(10,80); This is going to be replaced later with something to draw the objects in our scene.
GLResize – Here’s another function I’ll add to the Scene class. This function is called when the main frame is resized. It recalculates the boundaries of the scene so that the contents of the scene are kept in proportion with the master frame. I know I’ll need this since other OpenGL programs have given general protection fault errors if I don’t resize the scene.
I’m also going to add a few member variables. I’m not a big stickler on the public and private issues here so for now I’ll make them all public and decide later. I’m also going to enforce another naming convention for all class member variables. I’m going to prefix them with a "m_". No reason, I just like them that way.
M_x1,m_x2,m_y1,m_y2 - These are going to help me figure out the bounds of the scene so that I can setup my viewport accordingly.
Now another question: Where are we going to make this call to draw each scene from? OpenGL is quickly becoming supported on a number of different platforms, e.g. Linux, Windows, Solaris, Macintosh etc. Naturally we’d like to maximize the time we spend writing this modeller and make it as portable as possible. One way to do this is to add a layer of abstraction between the silly OS and the modeller code itself. With this in mind we’re going to create another class. This is going to be called the GLManager. It’s going to manage the four scenes and also house all messages mapping code. What do I mean by that ? Well every operating system works in pretty much the same way, the hardware and the users interact with the system through messages. When I click the mouse on the screen I create a message in the operating system which is then mapped to the current application. Depending on where I click and which button I use, the application can then choose to act on this message or not.
Normally a windows application handles messages in either the Document class or the Main Frame. In our case we’re going to use the view class. I’m going to add a member variable to the View class which is an instantiation of the GLManager class. From here we’ll pass off all the clicking messages etc to the GLManager. That way, if I ever want to port the code to a different platform, I can simply replace this single piece and recompile. The core modeling functionality won’t have to change.
Let’s start building my GLManager class. Create a new class as before and add the following member variables.
M_SideView = This is a class of type GLScene. It’s going to hold the side view of whatever it is I’m modelling. I create three more member variables of this type, one the plan, elevation and 3Dview accordingly.
Preparing the Window
Just like we added an Init function to the scene class, we should do the same for the manager. This is where we’ll perform the SetPixelFormat functionality and get the window ready for drawing using OpenGL. We’re also going to need some hDC and hRC variables here. These will help us when we need to set the device context etc.
Let’s go ahead and create the SetPixelFormat function right now. We add this to the GLManager class. It takes a single parameter which we pass in from the Cview class. The parameter is the hWnd handle which we’ll use to create the Device and Rendering contexts from.
Repainting the Screen
Let’s also add a Draw function for the Manager. This is how the Document View and the Manager are going to interact. Let’s hook them in right now:
Normally a document repaints when the application receives the WM_PAINT window. This only gets generated when we interact with the window. For example when we resize the window or drag another window over it. We need a way to make this happen without user interaction. For that we’ll use a Timer. The Timer ticks off every 10th of a second. This is just enough times per second to fool the eye into thinking it’s smooth animation.
I do this by creating a Timer in the OnCreate() function of the view class. This is done like so…
SetTimer(101,10,NULL);
This is going to trigger a WM_TIMER message every 10 milliseconds. This is useful but only if we implement the WM_TIMER message handler.
A Message handler is easy to create. Simply right click on the class ( in this case our view class ) and select "Add Windows Message handler". From the leftmost window which pops up select the message ( in this case WM_TIMER ). Hit "Add and Edit". You’ll be brought to the implementation of the message handler. VC++ handles creation of all the prototypes and declarations etc in the class.
Now we need to tell the window to send a WM_PAINT message. Easily done. In the OnTimer message handler we just created insert the following.
// Invalid this view.
Invalidate(FALSE);
Now add this to the manager in the Draw function
// Make the rendering context current
wglMakeCurrent(m_hDC,m_hRC);
// Only clear the buffer once.
// This clears ALL screen buffers.
glClear(GL_COLOR_BUFFER_BIT | GL_DEPTH_BUFFER_BIT);
m_GLScenePlan.Draw();
etc.....
You'll also want to add the following to the View's OnDraw function
// Call our external OpenGL code
m_GLManager.GLDraw();
// Swap our scene to the front
m_GLManager.GLSwapBuffers();
Note how I slipped in the GLSwapBuffers call, that's just a simple 1 line function that swaps the buffers using SwapBuffers(m_hDC);
At this point it occurs to me that I’d like an ortho graphic projection in the side, plan and elevation view and a perspective projection in the 3Dview. This leads me to add a new member function to the GLScene class.
GLSetProjection(). This function sets the projection mode for the scene. I’m going to know which projection mode is used by maintaining a flag on the scene ( add another member variable: m_sceneprojection).
At this point you should have a good grasp of what I’m trying to achieve here. Each of the four scenes acts as an independent window onto our set of objects. I’m going to perform operations which effect ALL scenes in the GLManager. Things which effect a single scene will be managed at the scene class. We’ve already implemented an example of this idea with the GLScene’s Draw function.
Let’s try compiling and see what happens now. It’s a good idea to compile every opportunity you get. This keeps you sane. I also like to hit the Save All button before I execute my code. This pays dividends when your program crashes the compiler and you lose your changes. So getting back, hit Ctrl-F5 at this point and you should get a window, which repaints itself. If you’ve implemented the torus functionality in the scene class you should also see these.
Now that we have four views of a scene, it’s time to make them display slightly differently. To this end I now add three new variables to the scene class. These rotate in the three different axes. I’m going to call these m_RotateX, m_RotateY, m_RotateZ.
These are going to be set individually to rotate each scene so that we see the correct side of the objects. So in the manager, create a function glInit() and put some code in there to set every scene’s rotation’s individually. Try something like this…
// Reset The Current Viewport And Perspective Transformation
glViewport(m_x1, m_y1, m_width, m_height);
// Reset the current projection matrix
GLSetProjection();
// Reset The Model Matrix
glMatrixMode(GL_MODELVIEW);
glLoadIdentity();
Time to Draw something
Ok, here’s where the rubber meets the road. Every scene has an origin. We’re going to draw a few colored lines at the origin to represent the axes. We’re going to add a few functions and some code here so try and stay with me. First lets add a member function to the Scene class. It’s going to just draw the axes so a logical name would be GLDrawAxes();
In it we’ll put just openGL code to draw the axes. Here’s that code:
// We want the axes lines a little thicker
glLineWidth(3.0);
glBegin(GL_LINES);
glColor3f(1,0,0);
glVertex3f(0,0,0 );
glVertex3f(10,0,0);
glColor3f(0,1,0);
glVertex3f(0,0,0 );
glVertex3f(0,10,0);
glColor3f(0,0,1);
glVertex3f(0,0,0 );
glVertex3f(0,0,10);
glEnd();
// Set the line width back to the norm
glLineWidth(1.0);
In the Scene Draw function we’ll add this to draw the axes.
// Draw the Axis in the scene
DrawAxes();
Try running now and you should get a nice editor with 4 view’s, axes in each one.
I like it but what does it do?
Right now our program does nothing. Up until this point we've been focusing on
setting stuff up. We've covered the window, the device context, the rendering context and
repainting. We've even cleared the screen and thrown in an axis. We still haven't touched
on the modeling aspect of this project. Well then it sounds to me like we need to get
started.
In order to model stuff, I decided to go out, get a cigarette and a nice hot cup of tea.
Then I sat on my doorstep for a while and I stared at the world. I found myself watching
the world go by and wondering: what's the basic unit of all this stuff? How can I capture
the walker, the jogger, the jogger's dog, the trees, the cars, the ground the drive on and
everything else. This was the type of stuff I want to be able to model.
I came up with the notion of the element.
There are really two different types of things to model: Living and dead. This translates
to moving and non-moving in the simplest sense. From this I found that they're both just
composed of the same thing, for the purpose of this discussion we'll call that thing an
element.
An element is made up of a simple mesh. Imagine I took my hand and put it in a rubber
glove. That's a mesh. A mesh is basically analogous to a fisherman's net. The holes
represent polygons in our scene. The lines in the net represent the edges of those
polygons. The intersections of the lines represent the points in the mesh.
An element knows how to do things. It knows how to draw itself. It should know how to
rotate and translate itself. It should also know how to add a triangle to itself and
delete one from itself. It should have a good idea of how many points, triangles etc are
contained in it and it should know how to manage them. It might also know what color it is
and whether or not it's texture mapped. That's a lot for a silly little thing called an
element. Guess who's going to have to teach it these things, that's right you and I. Oh
and before I forget an element might contain other elements. Take for example your upper
arm. It rotates around your shoulder. When it does so, it takes your lower arm with it. In
this sense, the lower arm is a child of the upper arm. Like-wise, fingers on your hand are
a child of the lower arm. That would make them grandchildren of the upper arm! Confused
yet? Don't worry we'll get to all that later.
Let's get building…
Let's create our element class. As before right click on the project and select
new class, generic and type in a good class name. I'm going to trust you to pick a good
name so don't let me down.
An element needs member variables. The most crucial thing in an element are the vertices.
We could create a member variable for the vertices but we don't have a class of type
vertex! We should create one…you know the drill. Let's call it GLPoint. We'll give it
an x,y and z member variable all of type float. That should do it.
We'll also need a triangle class. This is so that we can draw each triangle and re-use
vertices across triangles. Just create another class with 3 member variables of type
integer. Why integer and not GLPoint? Simple, the triangle doesn't store the point
information, the element does. The triangle stores 3 integers which are each indexes into
the element point array. Make sense? Good.
Now back to the element. Let's create an array of vertices (I know, I know we should
create them as needed using a linked list but I can't deal with that right now).
In any case I'm throwing in
GLTriangle m_triangles[100];
GLPoint m_vertices[100];
Int m_num_vertices;
Int m_num_triangles;
Into the element class definition. Let's also throw in an integer called m_num_vertices.
This will keep track of how many vertices are in our scene. Make sure to initialize this
variable in the class constructor to 0. Otherwise you never know what might happen.
Remember I said that an element knows how to draw itself ? Well it doesn't but it will.
Let's write that code now. Add a member function to GLElement called Draw(). It should
bring you to that function to implement it. Can you guess what we're going to do in there?
Write some code that loops through all the triangles in the scene and draws a GL_TRIANGLE
for each one. The best way to do this is something like
GlBegin(GL_TRIANGLES);
Loop in here
GlEnd();
Using GL_TRIANGLES beats GL_TRIANGLE as there's less glBegin and glEnd calls. Remember
that.
This is all fine but we need to call this function. Right now the scene just draws the
axes. We should call this function from the scene's Draw function. Guess what ? The scene
can't call a function on an object that it doesn't know about. Ok this presents a problem.
I could declare the elements on the scene class but then we'd maintain 4 different
versions of the same element. We can't do that. It'd be better if we had the manager act
like a manager and manage the objects. Here's how we'll do that.
Create a new class, which is called GLObject. I'm setting this up so that the GLObject has
many elements. A scene has one reference to the GLObject and the manager actually OWNS the
GLObject. That way there's only one set of data, used by all 4 viewports/scenes and
maintained ( saved, loaded etc.) by the manager. To complete this trick, add a member
variable to the GLObject which is an array of elements. You should add an array which is
the elements and an integer which is the number of elements in the GLobject . This
m_num_elements integer should be initialized to zero in the constructor. Ok now add a
member variable to the GLManager of type GLObject. Finally, add a member variable to the
scene which is a GLObject * note that's a pointer to a GLObject, not an actual GLObject.
So now the scenes have a pointer to the object but that's all. We'll need to set that
pointer to point to the GLManager's actual GLObject. I did this in the GLInit function of
the manager. Remember when we put code in there to call glInit on the scenes? Well now
we'll pass in the GLObject pointer to that function. That code looks like this
// Declaration
Void GLScene::GLInit(GLObject *object);
// Now the function call in the manager: pass in the address of the object member variable
m_planview.GLInit( &m_object );
Allright, now the scenes know about the Object, so they can call the object to draw
itself. Add this code into the Draw function of the scene. Looks a little like this…
M_object->GLDraw();
Note you have to use the -> thing as it's a pointer to a GLObject, not an actual
GLObject. Inside the GLObject GLDraw() function , we'll loop from 0 to m_num_elements and
call the Draw function on each one. I'm sure you can handle that code.
Come With Me If You Want To Compile
So at this point we can compile the code but if you try and run it, it'll either
bomb or draw nothing at all. Why's that? Well because we're drawing 0 elements and each
element has 0 vertices and 0 triangles! Man this is tough. We've built a lot and I'm
having trouble keeping it straight in my head. Pretty soon we're going to level off the
creation of new classes and from there we'll just add functionality to the class structure
that we have. Let's regroup for a moment and list off the classes you should have at this
point.
- An application class
- A Main Frame Class – This holds the document – in our case the application
should have a Single Document Interface or SDI and hence we only have on document
instance.
- A Document Class – This houses the document view.
- A View Class – This is where we’ll add in our message handlers etc. We’ll
also invoke our OpenGL calls from here.
- ToolBar resource
- Perhaps a dialogue resource etc.
This was all generated by VC++, now we'll list what YOU've created.
- A Manager class - holds the Object and the Scenes
- An Element Class - Holds the Vertices and the Triangles
- A 3D Point class - Holds the points
- A Scene - Holds a reference to the Object so that it can use the functions on it.
- An Object class - Holds all the elements
- A Triangle class - Holds 3 integers which are the indexes into the element Vertex array.
You should definitely compile and fix any bugs at this point. There shouldn't be any but
you never know.
All this and nothing to show for it
That's all going to change. We have everything we need to display our models but
we're missing one vital thing. Our model factory! Yes that's right, we're going to create
a class now that'll create elements of different shapes and sizes so that we can insert
them into our scene.
Create a class and call it GLElementGenerator. This is going to have a few functions and
no member variables. The first function we'll build will take a single paramater, a
pointer to an element. Looks like this
Void GLElementGenerator::CreateCube(GLElement *element)
In this function we'll add code to build a simple cube onto the element pointer. This will
be called from the GLManager whenever someone clicks on the right button. Let's create the
button now. Using the pane on the left, change to the resources view. Then click on
ToolBars. Add a button to the toolbar by drawing something in the gray toolbar button on
the right. This creates a new button. Hit Alt-Enter to bring up the buttons' properties.
You'll see a random name generated by VC++ in the ID of the button. Type something
meaningful in this. Since we're going to use this button to create a cube, call the
button, ID_ADD_CUBE or something like that.
Next go back to the Class view and right click on the View class, select Add Windows
Message Handler. A window will pop up and you should select the ID from the list box in
the MIDDLE of the window, not the one on the left ( it won't show up here anyway ). Select
ID_ADD_CUBE and hit the Add and Edit button.
This brings you to the code with a TODO statement saying you should add your own code
here. Let's do it. Type something like m_GLManager.GLAddCube(); We haven't implemented
this function yet so let's do that now. Right click on the manager class and select add
member function, type GLAddCube in the box and hit ok. Again, this brings us to a TODO
statement.
Right click again and add a member variable to GLManager which of type GLElementGenerator
called m_generator. This is how the manager will use the generator. Next go back to the
Addcube function in the Manager and call the CreateCube function from there. It'll look
something like this:
M_generator.CreateCube( m_object.m_elements[m_num_elements] );
M_object.m_num_elements ++;
Note that after the call we increment the number of elements in the Object. Actually I
moved this to a small function on the Object class that does the same thing. That way, the
thing is encapsulated a little more. It means you have to move the generator to the Object
class also. It's up to you…
Now time to implement CreateCube(). Go to the create cube function and add something like
the following.
// Set the number of vertices and triangles
Element->m_num_vertices = 3;
Element->m_num_triangles = 1;
// Setup the element vertices
Element->m_vertices[0].x = 0;
Element->m_vertices[0].y = 0;
Element->m_vertices[0].z = 0;
Element->m_vertices[1].x = 20;
Element->m_vertices[1].y = 20;
Element->m_vertices[1].z = 20;
Element->m_vertices[2].x = 10;
Element->m_vertices[2].y = 10;
Element->m_vertices[2].z = 10;
// Set the triangles vertex indeces
Element->m_triangles[0].a = 0;
Element->m_triangles[0].b = 0;
Element->m_triangles[0].c = 0;
Compile and run this. You can try hitting the toolbar button now and you should see a nice
triangle appear in the scene. In ALL 4 scenes actually. You can go back to CreateCube to
make it REALLY create a cube. I'm not going to bore you with that explanation, unless you
ask me to.
A Good Days' Work
Phew that was a lot of work. At this point the object model ( pardon the pun )
is pretty solid. It might not be the best way to organize things but hey, I said at the
start I'm no expert. I leave it up to your discretion.
Next time we'll add in loading and saving and the creation of some more meaningful
objects. We still can't select any points or faces. That's a bummer. We also can't move
anything around. I'm going to cover these soon but let's walk before we run…I've
received good feedback so far but I need more suggestions as to how to improve the site. LET ME KNOW.
Add a Mesh
Alright, at this point I'm going to allow you all a little extra credit. We have the element generator class created and it should allow you to create some useful functions. The first one that pops into my head is a function to create a polygon mesh of triangles. We have the code written to draw the elements ( cycles through all the element's triangles and draws each one in turn ), so it should be easy for you all to create some code to build a simple mesh. I wanted to make mine as useful as possible so I had it take 2 arguments, width and height which become the width and height of my polygon mesh. Here's the code in case you're too lazy to write it yourself. You'll notice I have texture coordinates generated in here too. More on this later. You'll probably get some compiler errors when you compile this but just add variables as you need them and take your best guess as to what their types are. Mostly integers, there shouldn't be to much that you can't figure out yourself.
// This function adds a simple mesh
void GLElementGenerator::AddMesh(GLElementMesh *element, int width, int height)
{
int i = 0;
int j = 0;
int k = 0;
// Define the element
element->m_num_vertices = width * height;
// Multiply the total triangles by two as it's a square
element->m_num_triangles = ((width-1) * (height-1) ) * 2;
// This element has a center of gravity ( anchor )
// rooted at the origin ( until it's moved )
element->m_anchor.x = 0;
element->m_anchor.y = 0;
element->m_anchor.z = 0;
// Setup the vertices
for (i=0 ; i < height ; i++ ) {
for (j=0 ; j < width ; j++ ) {
element->m_vertices[(i * width)+j].x = j * 10;
element->m_vertices[(i * width)+j].y = 0 ;
element->m_vertices[(i * width)+j].z = i * 10;
}
}
// Setup the triangles in the mesh
for ( i = 0 ; i < height-1 ; i++ ) {
for ( j = 0 ; j < width-1 ; j++ ) {
element->m_triangles[k ].m_selected = FALSE;
// One side of the
square
// a,b and c are each
vertices indeces
element->m_triangles[k ].a = i * width + j ;
element->m_triangles[k ].b = i * width + j + 1 ;
element->m_triangles[k ].c = i * width + j + width ;
element->m_triangles[k ].m_red = 1 ;
element->m_triangles[k ].m_blue = 1 ;
element->m_triangles[k ].m_green = 1 ;
// Now the texture
coordinates
element->m_triangles[k ].m_tex_coord_a.x = (float) i / (height-1);
element->m_triangles[k ].m_tex_coord_a.y = (float) j / (width-1);
element->m_triangles[k ].m_tex_coord_b.x = (float) i / (height-1);
element->m_triangles[k ].m_tex_coord_b.y = (float) (j + 1) / (width-1);
element->m_triangles[k ].m_tex_coord_c.x = (float) (i + 1) / (height-1);
element->m_triangles[k ].m_tex_coord_c.y = (float) j / (width-1);
k ++;
// The other side of
the square
element->m_triangles[k ].a = i * width + j + width ;
element->m_triangles[k ].b = i * width + j + 1 ;
element->m_triangles[k ].c = i * width + j + width + 1;
element->m_triangles[k ].m_red = 1 ;
element->m_triangles[k ].m_blue = 1 ;
element->m_triangles[k ].m_green = 1 ;
// Now the texture
coordinates
element->m_triangles[k ].m_tex_coord_a.x = (float) (i + 1) / (height-1);
element->m_triangles[k ].m_tex_coord_a.y = (float) j / (width-1);
element->m_triangles[k ].m_tex_coord_b.x = (float) i / (height-1) ;
element->m_triangles[k ].m_tex_coord_b.y = (float) (j + 1 )/ (width-1);
element->m_triangles[k ].m_tex_coord_c.x = (float) (i + 1 ) / (height-1) ;
element->m_triangles[k ].m_tex_coord_c.y = (float) (j + 1 ) / (width-1) ;
k ++;
}
}
}
You'll also notice I have assigned color variables to each triangle. These will be used later on when we go to draw the triangles. The other essential item I've added to each element is the anchor point. It's of type Point3D and is used to rotate the object around. By this point I trust you all to be able to create functions on a class and member variables so I'm not going to explain how to do that any more. Next up is Loading and Saving, hint we're using the CArchive class provided by MFC.
Should I Save or Should I Load Now?
At this point we have a number of classes which hold data. The data varies from
triangle vertex data to point data to colors to a whole bunch of other stuff. This is fine
but not much use if we can't save the information. This is pretty simple to do and while
we're at it lets' write some code to load the information too. The way we do this is to
make use of the MFC classes.
On the view class, create an implementation of the Windows message "SERIALIZE".
This is the way MFC saves and loads information. You'll find the function is created with
an argument of "CArchive" type. This is the class to which we write the
information.
The problem is that since the MFC calls the same function for both saving or loading, how
do we know whether to save of load from the CArchive ?
Answer: The MFC puts the class into a loading or storing state automatically. You can find
out what the state is by calling IsStoring() method on the archive. This returns TRUE if
it's saving and FALSE if it's loading. Check out the following code snippet:
if (ar.IsStoring())
{
// storing code
m_GLManager.Save(ar);
}
else
{ // loading code
m_GLManager.Load(ar);
}
Notice how I defer to the manager to do the saving. The manager passes the buck also and
defers to the objects. Each object knows how to save itself. That's the general idea. So
create a Save and Load function on each and pass in the archive object.
Then to actually save something just use the << and >> operators. The <<
writes data TO the archive ( saves it ) and the >> takes data FROM the archive (
loads it ). Check out this code snippet from my element mesh class:
void GLElementMesh::GLSave(CArchive &ar)
{
int i;
// Write in the number of vertices
ar << m_num_vertices;
// Write out the vertices
for (i=0 ; i <m_num_vertices ; i++) {
m_vertices[i].Save(ar);
}
m_anchor.Save(ar);
// Write out the color of the element
ar << m_red;
ar << m_green ;
ar << m_blue ;
// Write out the number of strips
ar << m_num_triangles;
// Write out the triangles
for (i=0 ; i <m_num_triangles ; i++) {
m_triangles[i].Save(ar);
}
// Write out the texture
ar << m_texture_idx;
// Write out the children
ar << m_num_children ;
}
This is for saving. Notice how everything is in a certain order? In order to load the
data, I need to do things in the exact same order, the only thing that changes is the
<< operator to the >> operator. Make sure you do things in the correct
sequence otherwise you'll load the right data into the wrong spot.
When you run this, notice how you get the file open and the file save dialogs for free.
You also get the save as dialog for free. You'll notice the save and load dialogs have a
file type field. This is probably blank for you right now.
If you open your resource file you'll see an ID_MAINFRAME entry in the string table. This
attribute covers stuff like the Application name, the File Types and extensions etc that
are valid for the application.
If you enter something like this in there you'll get a nice file type in your application
when you run it.
Mantisoft OGLM\nScene\nOGLM\nOGLM Scenes (*.oglm)\n.oglm\nOGLM.Document\nOGLM Document
The first few strings ( separated by \n newline characters ) are the application titles
for the mainframe and the documents. The next are for the file types drop down. The next
is the extension for your files, the final things are pretty trivial and can be ignored.
That's about it for now, saving and loading your objects should be functional. If you have
trouble with this ( it's sooooo easy with MFC ) email me and I'll be happy to help you.
Time to Step Back, WAAaaay Back
At this point it's probably a good idea to review the features the modeller
incorporates and in addition attempt to determine where the modeller is lacking.
We Have...
4 different views of an object, one of them is 3D + perspective.
Can create meshes but can't input paramaters.
Need to cover...
How to create a dialogue in MFC and pass parameters to and from it. From here we'll get
our inputs for the mesh.
How to select a point
How to move a point
How to select a triangle face
How to change the views from 4 equal to 3 and 1
How to build a lathe
How to build an extrusion tool
That's a lot so let's take it one step at a time...
Eeny, Meeny, Miney, Mo = Selection
Before we go any further, lets' talk about point selection. Let's say I add a point to my
scene, how can I use the mouse to move it around ? Good question. I still haven't fully
figured this one out but let me explain how to select it for now. There's a couple of ways
to implement selection. The redbook mentions two. The first is the use of the openGL
selection buffer. Basically a buffer is an area into which you draw stuff. Example the
off-screen buffer is where the scene gets rendered and then when it's complete we swap the
off-screen and the on screen buffer to display the scene. This is how double-buffering
works. You always draw to the off-screen buffer.
With the selection buffer we do the same thing but with a twist. As each item is drawn to
the selection buffer, it's given a name. In other words you make an openGL call to
register that item with the openGL state machine. This sounds technical and it is to a
certain extent. I'm not going to go into this anymore than to say I've tried implementing
this and run into a large number of problems. The first and most bothersome is that the
selection buffer doesn't work consistantly across video cards. Meaning what works on one
doesn't work on another. I've also run into buffer-overflow meaning as I name all my
points ( potentially thousands ) I reach a point where the buffer is full and can't name
anymore elements. There are ways around this problem but I thought better of figuring them
out. If you'd like more information on selection go to the SGI. redBook examples page
(http://www.sgi.com/software/opengl/examples/redbook/) and search for selection on the
page.
No on to the way I did end up implementing selection. This method is also endorsed by the
RedBook so even though I'm not strictly using openGL buffers it's still an excellent way
of implementing selection. I've also found that this works quite well on all graphics
cards except Voodoo. So stay away from voodoo's if you want to implement selection.
Alternatively you could implement this with Glide from 3dfx if you wanted it to work on a
voodoo card. It would work no problem. Here's how it works.
The scene is basically made up of a number of points, lines an faces. Let's stick with the
simple method of point selection. The first thing we do is render the points in the scene.
This is simple, just add some code to the Draw functions of an element to cycle through
it's points and glVertex each one inside a glBegin(GL_POINTS ). Remember to set the point
size to something meaningful, probably 5.0 is good for most purposes. Ok, now the user can
see what we want them to pick. Remember to compile as often as possible, we're about to
get tricky...
Next we want to draw the same scene but in a RAINBOW of colors that the user won't eve
see. Here's how it's going to work...
1) We draw the regular scene to the screen in the normal colors.
2) We draw the same scene in a RAINBOW of colors to the off-screen buffer, giving each
element in each view a unique color. This color will be it's identifier.
3) The user clicks the screen to select a point
4) We get the mouse x and y coordinates from where the user clicked, find out which color
IN THE OFF-SCREEN selection scene they clicked on and with some simple arithmetic and
manipulation we find out which point they selected.
5) We set the points' selected property to "ON" and it draw's itself in a
special high-lighted color in the regular screen scene.
Make sense ? Try downloading the OGLM executable and test this out. My points go from
being normal colors to being red. We do the same thing when the user wants to deselect the
point except if the point is already selected then we set selection to be "OFF"
for that vertex.
Ok so that's all well and good, how the heck are we going to do that ? Hmm, how the heck
am I going to explain how I did that?
At this point we should revisit where the points or vertices are stored. I've actually
changed my position on this one. I had originally thought it would be good to have to
elements own the vertices from which they are built. This is fine but it does raise a
couple of issues. The first is that the vertices cannot be shared between elements. In
other words all elements are distinct, they cannot be joined together. The second issue
I've discovered with this is that vertices cannot be re-used across elements which leads
to a waste of resources. In order to figure this out I decided one day to move the ACTUAL
storage of the vertices from the element to the parent which is the object ( remember we
said that the scene was made up of an object and an object is made up of a number of
elements ).
This seems like a big deal but in reality, once you move the actual storage of the points
from the element to the object, everything works out fine. There's no real syntax change
even. The key here is that you can use a reference to an class just hte same as if it were
the class itself. Pretty cool.
Since the points are owned by the object, I just add a small draw type function to cycle
through all the points, drawing each one in turn in a new color. Here's the code to do
that:
// This function draws an element ( hopefully to the back buffer )
void GLElementMesh::GLDrawSelection(int *names_offset, int selection_mode)
{
int i;
Point3D a;
Point3D b;
Point3D c;
GLubyte red;
GLubyte green;
GLubyte blue;
int modifier = 256;
// Disable texture mapping
glDisable(GL_TEXTURE_2D);
glDisable(GL_LIGHTING);
// If we're looking to select a triangle then...
if (selection_mode == OGLM_SELECTION_TRIANGLE ) {
// Loop through the element's triangles
// drawing each one in turn
glBegin(GL_TRIANGLES);
for (i=0 ; i < m_num_triangles ; i ++ ) {
// First get the
vertices
a =
m_vertices[m_triangles[i].a];
b =
m_vertices[m_triangles[i].b];
c =
m_vertices[m_triangles[i].c];
(*names_offset)++ ;
red = ( (*names_offset)
% modifier ) ;
green = ( (
(*names_offset) >> 8 ) % modifier ) ;
blue = ( (
(*names_offset) >> 16 ) % modifier ) ;
// IF this triangle is
selected then display it as white
glColor3ub(red, green,
blue);
// Next draw the
triangle
glVertex3f(a.x,a.y,a.z);
glVertex3f(b.x,b.y,b.z);
glVertex3f(c.x,c.y,c.z);
}
glEnd();
}
// If we're trying to select a point then...
else if ( selection_mode == OGLM_SELECTION_POINT ) {
// Loop through the element's triangles
// drawing each one in turn
glBegin(GL_POINTS);
for (i=0 ; i < m_num_vertices ; i ++ ) {
// First get the
vertices
//a = m_vertices[i];
a =
m_vertices[m_vertex_indeces[i]];
(*names_offset)++ ;
red = ( (*names_offset)
% modifier ) ;
green = ( (
(*names_offset) >> 8 ) % modifier ) ;
blue = ( (
(*names_offset) >> 16 ) % modifier ) ;
// set the color for
this point
glColor3ub(red, green,
blue);
// Next draw the point
glVertex3f(a.x,a.y,a.z);
}
glEnd();
}
// Finally draw the childrens' points or triangles as the case may be
for (i = 0 ; i < m_num_children ; i ++ ) {
m_children[i]->GLDrawSelection(names_offset,
selection_mode);
}
}
Couple of things to note here: The first is that I'm disabling lighting etc which might effect the color of the thing that's drawn. The second is that I'm passing in a names_offset counter which I use to "name" stuff. All this means is that I'm giving each item a unique name or color. You'll see why in a second. Tha final thing to note is the recursive piece at the end which refer to children. Don't worry too much about this for now, I meant to explain children and the heirarchy thing this week but have not had time to do it justice. I'll get back to it later. It's simply that each element has a number of children which it's responsible for and thy TOO are elements who ALSO have children. I just think of my family and it helps give each element a personality! Just kidding.
Getting back to selection: When something is clicked, we need to find ou what it was. For this we need the following code:
// This function processes which points are clicked on and
// has the logic to mark them as selected.
void GLManager::GLProcessSelection(int xPos, int yPos)
{
unsigned char pixels[3] ; // need 3 bytes to store Red, Green and Blue
values
int red, green, blue ;
int selected =0 ;
int modifier = 256;
int i = 0;
glClearColor(0,0,0,0);
glDisable(GL_DITHER);
// Draw a special selection scene to the back buffer
// This scene renders every object in a unique color.
// we figure out which was pressed by detecting what's
// the color under the mouse
GLDrawSelection();
// Get the color under the mouse.
glReadPixels(xPos,m_height - yPos, 1, 1, GL_RGB, GL_UNSIGNED_BYTE,
pixels);
red = ((int)pixels[0] );
green = ((int)pixels[1] ) * modifier ;
blue = ((int)pixels[2] ) * modifier * modifier ;
selected = red + green + blue -1;
// If we're selecting a point...
if (m_selection_mode == OGLM_SELECTION_POINT) {
// If we're selecting in a normal drawing
// scenario ( not the lathe or preview)
if ((m_drawing_mode == OGLM_DRAWING_NORMAL ) ||
(m_drawing_mode ==
OGLM_DRAWING_THREEANDONE ) ||
(m_drawing_mode ==
OGLM_DRAWING_ADDTRIANGLE ) ){
if (selected <
m_object.GLGetTotalNumberVertices() ){
// Set the point to the selected thing
m_object.m_current_point = selected;
//m_object.GLSetSelectedPoint();
m_object.m_vertices[selected].SetSelected();
// If we're adding triangles then have
// the object add this point to the list of selected
// vertices for the triangle
if (m_drawing_mode == OGLM_DRAWING_ADDTRIANGLE ) {
m_object.GLSetTriangleIndex(selected);
}
}
}
else if (m_drawing_mode == OGLM_DRAWING_LATHE )
{
// Otherwise we're
previewing the lathe
if (selected <
m_preview_object.GLGetTotalNumberVertices() ){
// Set the point to the selected thing
m_preview_object.m_current_point = selected;
m_preview_object.GLSetSelectedPoint();
}
}
}
// It's a triangle
else if (m_selection_mode == OGLM_SELECTION_TRIANGLE) {
if (selected <
m_object.GLGetTotalNumberVertices() ) {
// Set the current
triangle to the selected thing
m_object.m_current_triangle = selected;
m_object.GLSetSelectedTriangle();
}
}
}
Whenever the screen is clicked I call this function. It takes the x, y coordinates of the
screen click and works out what color is under the mouse at that point in the screen.
Since everything is drawn with a unique color I can work out which item is selected !
Pretty cool eh? I do this with a readpixels call, see above.
I think that should do it for me now. Sorry I missed out on heirarchys this week. I also need to cover the Lathe etc. patience. Patience...
>> Download << - last updated - June.23.2000
Space Mountain - April.07.2000
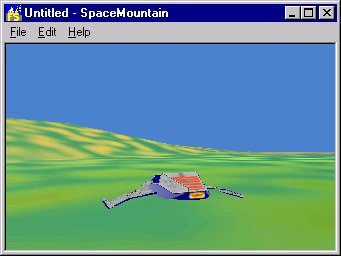
This is the latest thing I've coded. It's a simple program which moves a rocket ship around a small terrain. I've created both these models with the OGLM modelling tool I've built. See above. It's pretty cool if you ask me and it was quick to code. I only had to create about 50 lines of code for the whole program. The rest was re-used from the modeller. It's great having built this thing to be finally able to create something worthwhile. If you haven't considered reading the article above I highly recommend it. In addition if you download the OGLM ( see above ) then you can use it to edit the models in Space Mountain! You could try adding a little house or a bump in the landscape. It should work but persevere as the OGLM is still a little tricky to use.
Car Racer - Mar.25.2000 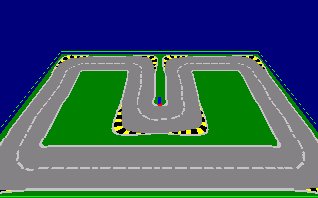
It's EXTREMELY basic as such, it'll give you all a good idea how to write a
basic game. Basically, this is the project I was working on when I decided to write the OGLM. In any case, this uses some textures to build a grid which is the
track. It also has collision detection and a nice hand brake effect ( press the space bar
when travelling at speed ). I think there's some code commented out to change the
viewpoint from third person ( currently) to first person. Change it however you want and
let me know if there's any problems. Maybe someone could redraw the tiles and send them
back to me? Anyway folks, I hope it's helpful.
>> Download <<
Screen Savers - Mar.24.2000
I've just added the code to a skeleton screen saver. This code is basically all
you need to create your own screen saver. I can't take credit for writing all of it as
I've pasted a lot of stuff from other sources but it's pretty simple anyway so I'm sure no
one will mind if I share it. It's a VC++ project, it creates a device context, rendering
context, intializes the GL and draws a nice teapot. You can change this easily. Look for
the RenderScene function. All you have to do is add in the drawing code. I don't have a
screen shot as I haven't figured out how to get a shot from a screen save ! Enjoy.
>> Download <<
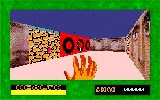
The maze of Madness (MOM) was a project built by Killian Breslin and I for our third year in Dublin City University. It's a take off of the popular Wolfenstein 3D game which gave birth to Doom. It's pretty cool as it features texture mapped representations of our class mates on the walls. The frame-rate on this thing is pretty amazing and I have to give credit to Killian aka Wig for working on that. He took the code and converted it to assember like a good thing and got the speed WAAAY up, even on a 386 it runs pretty fast but good luck finding one these days...
 Other cool features are Soundblaster support
and Novell network game support. This means you can play your buddy over the office
network. Be warned though I'm not responsible for any bad things that happen as a result
of this or any of the other programs on this site. That said, there's not really anything
bad that these programs could cause.
Other cool features are Soundblaster support
and Novell network game support. This means you can play your buddy over the office
network. Be warned though I'm not responsible for any bad things that happen as a result
of this or any of the other programs on this site. That said, there's not really anything
bad that these programs could cause.
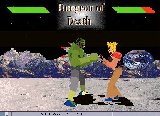
This is probably one of my more shining moments. This was a game built again by Killian and I. We created the Dungeon as our fourth year project. The effort took about 4-5months from initial concept.
The we developed this for Solaris which added to the difficulty. There's comprehensive documentation and code available on demand.
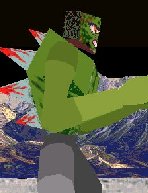 Features include such niceties as texture mapped
characters. A full 3D-editor also built for Solaris which we used to create the model
files. Once these are created you can animate them and save their motions ( for instance a
kick or punch ). The game then uses these files to animate the characters.
Features include such niceties as texture mapped
characters. A full 3D-editor also built for Solaris which we used to create the model
files. Once these are created you can animate them and save their motions ( for instance a
kick or punch ). The game then uses these files to animate the characters.
We also added network support and included some other sound features etc.
The battle takes place on the moon with Earth in the background. As the players rotate we have a nice shadow effect on the ground to give the illusion of realism.
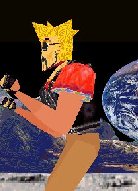 There are four characters in the game which we
constructed using the editor. This was another case of us using our fellow students as
cheap labour. We auditioned people for the parts of our characters. I've included to the
right, pictures of the end product. We have Spikey Back and The Dude ( yellow texture
mapped polygon hair).
There are four characters in the game which we
constructed using the editor. This was another case of us using our fellow students as
cheap labour. We auditioned people for the parts of our characters. I've included to the
right, pictures of the end product. We have Spikey Back and The Dude ( yellow texture
mapped polygon hair).
We also included a computer opponent who gets progressively smarter. He'll try and block your movements if you attempt to hit him and then he'll kick your ass so watch out.
Last time I compiled this was about 2 years ago on Solaris with network card installed so forgive me if this don't compile anymore. I've also managed to get it running on Linux with the network stuff ripped out.
>> Download Code << >> Download Documentation <<
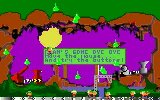
Gloop was kind of a joke but I wrote it anyway. It originally was born out of a drunken stuper I found myself in. I thought of the idea again when sober and decided to write it.
It involves Gloop falling from the ceiling of this cave. The cave dwellers collect it and use it to build missiles etc. There's more but I'm not going to go into it here. Let me know if you're interested.
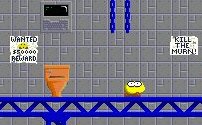
The Murns was another one of those freaky type games I started to write. It's still a work in progress but pretty entertaining. All the graphics functionality was built from scratch and uses VGA mode 13h ( remember that guy ?). There's no sound and no enemies. Oh well, it's still fun to watch the guy run around like a maniac.
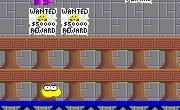 To sum it
up this is basically an example of fast 2-D tile based programming. There's no openGL or
anything as this was back in the days when that stuff was greek to me. The speed the murn
moves at is comparable to Sega Sonic and in total it took about 1 week to get to this
point. Features include keyboard handlers, blitting, hand drawn graphics by moi.
To sum it
up this is basically an example of fast 2-D tile based programming. There's no openGL or
anything as this was back in the days when that stuff was greek to me. The speed the murn
moves at is comparable to Sega Sonic and in total it took about 1 week to get to this
point. Features include keyboard handlers, blitting, hand drawn graphics by moi.